
Note: I am not a professional and do not claim to be an expert. Please be sure to always read instructions for all tools and products. Safety is very important and should be your top priority. Wear necessary protection when using tools (eye wear, hearing protection, gloves, etc.) and dust masks when sanding or cutting. Sarah Flips It is not responsible for any injury or damage. All of my designs are not professionally designed and are for private use only.
Learn how to make a DIY arch with simple tools! This step-by-step guide shows you how to use ribbon, 2x4s, and plywood to build a stunning archway for any room—budget-friendly and beginner-approved.
Table of Contents
Have you ever wanted to add a cute arch somewhere in your home? Whether it’s for a doorway, a niche, or just as an accent wall, arches bring so much character to a space. The best part? You don’t need specialized tools or expensive materials to make one!
I’ll walk you through exactly how I built mine, step by step, using simple supplies and a little bit of creativity.
Supplies You’ll Need to Build a DIY Arch
- Ribbon (to use as a guide for drawing the arch shape)
- 2x4s (for support and framing)
- Plywood sheet (to create the curved arch)
- Circular saw or jigsaw (for cutting the arch shape and scoring the plywood)
- Measuring tape & pencil (for marking your cuts)
- Screws (to attach the plywood to the supports)
- Drill or screwdriver (to secure everything together)
- Sandpaper or sander (to smooth edges)
- Drywall or joint compound (optional, if you want to finish the arch seamlessly into the wall)
- Paint + brush/roller (to match your décor)
How to Make an Arch for Your Home
Step 1: Create Your Arch Template
Instead of fussing with measuring tools, I grabbed a piece of ribbon and used it as my guide. Simply hold the ribbon at both ends and let it form into a half-circle shape. This trick makes it easy to draw a perfectly smooth curve for your arch.
Step 2: Cut Your Supports
Next, I cut a few 2x4s to use as supports. These will act as the frame that holds the arch in place. They don’t have to be complicated—just sturdy enough to keep everything aligned and secure.
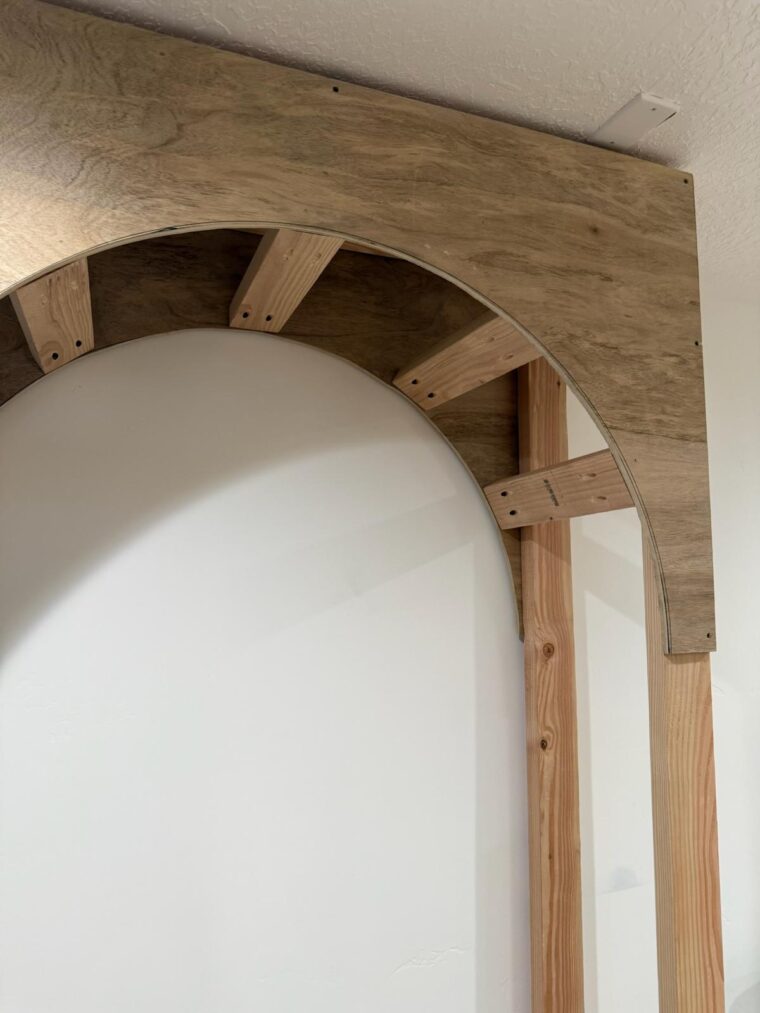
Step 3: Shape the Plywood
Here’s the fun part. To make plywood bend into that smooth arch shape, I made a series of cuts along the sheet. (Think of it like scoring—lots of thin cuts that allow the wood to flex.) Once you’ve done this, you’ll see the plywood start to curve naturally.
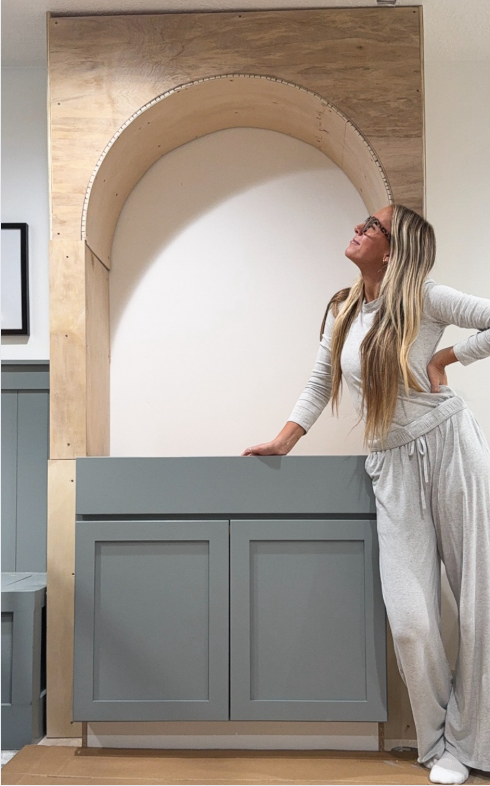
Step 4: Put It All Together
Attach the cut plywood to your 2×4 supports, screwing everything in place. As the plywood bends around the arch, it creates that perfect rounded shape. Just like that—you’ve got an arch!
Tips and tricks
- Make small, even cuts
- Use thinner plywood for easier bending
- Test your curve before attaching
- Don’t skip sanding
- Drywall compound hides imperfections
Do I need power tools to DIY AN ARCH?
A circular saw or jigsaw makes the job faster, but you could use a hand saw if that’s what you have—it’ll just take more time.
How wide should my arch be?
That depends on your space! Most DIY arches are 2–4 feet wide, but you can size yours up or down to fit your doorway, niche, or wall.
Can I build an arch without cutting plywood?
Yes! If you’re intimidated by cutting plywood, you can buy flexible drywall or bendable MDF from some home improvement stores. It’s a little pricier but saves time.
Is this project beginner-friendly?
Absolutely. As long as you measure carefully and take your time with cuts, this is a great DIY for beginners.


